Final Thoughts!

I seriously cannot believe that this semester is already over, it feels like I just started this blog project yesterday. I have to say I’ve really enjoyed doing this blog for my FDOM (Fundamentals of Digital and Online Media) class! It allowed me to expand my horizons and try something that I didn’t have a lot of experience with…cooking! I found that Twitter was really helpful when it came to working on this project. Twitter allowed me to gain feedback from my fellow classmates, and it allowed me to get more awareness about my blog. The other thing that helped was using the tags on WordPress, I feel like thats where I got the most blog traffic from fellow bloggers.

I definitely had some hits and some misses when it came to this experience, and i’ve learned a lot (just because it has cream cheese in it doesn’t mean it’ll be good). I have definitely narrowed down on my Pinterest which things i’d like to now try in the future, and which ones I should definitely avoid.

After taking this class I now can comfortably say I have mastered the art of blogging, and I know for a fact it’ll be helpful for my future in public relations. I feel that someday I will definitely return to the deep dark world of blogging, but for now its time to conquer finals week.


Au Revoir,

-Morgan

TDDance_CarltonDance_YouTube


Cookie Dough Dip! A Youtube Video!

Hello everyone! Tonight I had a study group over for my computer informational sciences (CIS) final tomorrow, and I wanted to make something yummy that everyone would enjoy, and that would be pretty easy to make. I ended up choosing to make something from my tasty treats board! The recipe itself came from a website called “Add a Pinch”. I’ll show you how to do it, and even give you my reactions in a fun YouTube video I made below!


Review: Oh my GOD! This dip is AMAZING! This is definitely my favorite thing that i’ve made over this whole project. I wouldn’t change a single thing when I make it again in the future. Everyone ate all of it at the study group get together, and the comment I heard most was that the best thing about it was the toffee chips!

Chicken roll ups

I have my first final tomorrow morning and had a few people over for a study group this afternoon to prepare. I decided to make a few recipes I found on Pinterest, this one and one that i’ll post later tonight. The chicken roll ups looked absolutely delicious on the picture, so I knew that I had to make them. I found the pin on my appetizers board , and the recipe was from a blog called ‘Jenna’s Journey’.

The recipe itself was pretty simple, all you need are:
1 pkg cream cheese (8oz)
1 pkg crescent rolls (6 ct)
2 shredded, cooked chicken breasts
2.5 c of whatever cheese you like (I used shredded mexican)
1/4 t salt
1/4 t pepper
1/4 stick melted butter

chicken ingredients

The first thing I did was boil the two chicken breasts on the stove for about 30 minutes until they were ready to be shredded.

chicken boiled

Next I used two forks and shredded the chicken. If it is soft enough then it should easily shred.

chicken shredded

Next I put the chicken into the bowl and mix it in with the cream cheese, cheese, and salt and pepper.

chicken shredded bowl


Once you’ve mixed everything together preheat the oven to 350, and spoon the mixture onto the crescent rolls

chicken cresant

Next pinch together the sides and roll it all together.

chicken rolled

Once you’ve stuffed and rolled all of the crescent rolls, coat the tops with butter.

chicken buttered

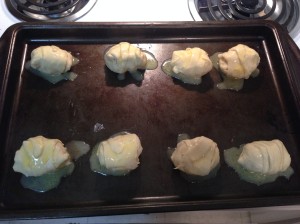
Cook for 20-25 minutes

chicken done

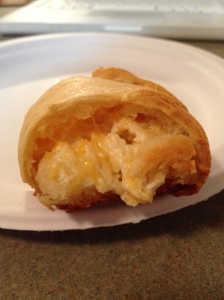
Finally, enjoy!

chicken inside


Review: These were actually pretty delicious, I was kind of surprised considering my first blog post with cream cheese didn’t go so well. I liked how cheesy they were, and they were an instant hit with the group. I ended up dipping mine in ranch dressing, which made it taste just as delicious. I will probably make these again in the future.

Breakfast Muffins!

For this week’s blog posting I decided to make something that would be “finals friendly”. Thats right, finals week is finally upon us, and I am totally stressed. I decided that I wanted to make something that would be yummy, easy to make, and easy to grab on the go. So I found this recipe on my Pinterest breakfast board, and knew that it would be perfect! The recipe came from a blog called “Yummy Mummy Club”, and it was relatively easy to make. You’ll see the steps, ingredients, and my reactions on the slideshow below.

This slideshow requires JavaScript.

The 5 Pinterest Food Blogs You Should Be Following!

Hello Everyone! Today I made a list of some of my favorite Pinterest food blogs that I get majority of my recipes from. I decided to do this through a cool new social media sharing site called ‘Storify’.

You can check out the story here! https://storify.com/morganmoritz/the-5-pinterest-food-blogs-you-should-be-following

PINTERESTing Food Mobile App

For this weeks class assignment we were supposed to make a mock mobile app for our blog. 

My first example is of the homepage where I used my sites theme of french macarons as the background, as well as the logo. I added links to the blog, my about page, my twitter page, my pinterest page, and the archives. The bottom tabs include links to any news I may post about my life or the blog. I also included a fan section where they can give me feedback about new pins I should try, or how their attempts at making things from Pinterest turned out. Finally, I included a photo gallery for all of the pictures of the recipes that I’ve made.

Image


My second page I made was the about page. I essentially took my normal about page, and made it into a mobile friendly version. 

 Image

Chocolate, Peanut Butter, Butterscotch Bird’s Nests

In honor of spring break quickly approaching, and my longing for warm breezy spring days, I decided to make a spring themed treat! A year or so ago I found this recipe from “The Curvy Carrot”, and thought it was too cute to pass up. I pinned this to my Tasty Treats board so I could save it for a rainy day (like today)!

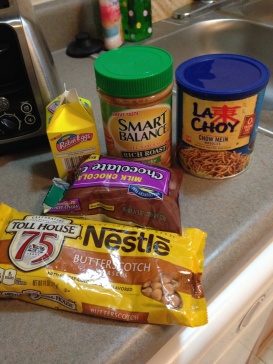
The recipe looked pretty simple, and involved no baking whatsoever. All you need for ingredients are: 

1 tablespoon of unsalted butter, for greasing the muffin pan (I used pam)

6 ounces (1/2 bag) of semi-sweet chocolate chips

6 ounces (1/2 bag) of butterscotch chips

1 cup creamy peanut butter 

6 ounces (1/2 of a large bag) of chow mein noodles

36 mini Cadbury eggs or jelly beans

Image

I started the process by spraying the muffin tin with pam spray to make sure the mixture wouldn’t stick once I attempted to remove them. Then in a large bowl I put the semi sweet chocolate chips and the butterscotch chips, and then I microwaved them in 30 second intervals, stirring in between. It only took two 30 second intervals for the chips to be completely melted.

Image

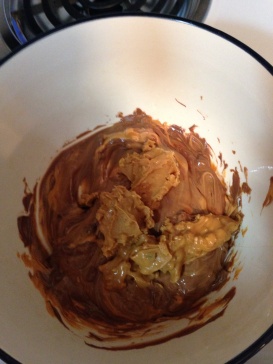
I next added peanut butter to the mix. I decided to add chunky, but you could do creamy if you prefer. I stirred the peanut butter in with the chips until it too was completely melted. 

Image

Next came the chow mein noodles. I used a rubbed spatula and mixed them in till they were completely coated. Note: It is okay if some of them break as the mixture is thick.

Image

Finally I scooped the mixture using a spoon into the muffin tins. This should make about 12 servings, depending on the size of your tin.

Image

I put them in the fridge for about 30 minutes to let them harden, and I popped them out with a spoon easily. I then topped them with Whoppers Robin Eggs and served.

Image

I brought these to a meeting I had tonight, and they were gone in a matter of minutes. They are so delicious, and have that nice mix of sweet and crunchy! I plan on making these again for Easter.

2-Minute Chocolate Chip Cookie For One

I was in the mood for something sweet, but I didn’t want to commit to making a whole lot of something. So when I found the recipe for a 2-minute chocolate chip cookie for one from Zoom Yummy after searching through my tasty treats board on Pinterest!

The recipe looked pretty simple, the ingredients you need are as follows:

  1. 2 tbsp (3O grams) unsalted butter,softened
  2. 1 1/2 tbsp (2O grams) white granulated sugar.
  3. 1 1/2 tbsp (2O grams) brown sugar.
  4. 2 tbsp (3Oml) beaten egg
  5. 1/4 tsp vanilla extract
  6. 5 tbsp (60 grams) all purpose flour
  7. 1/4 tsp baking soda
  8. pinch salt
  9. 1/4 cup (40 grams) chocolate chips

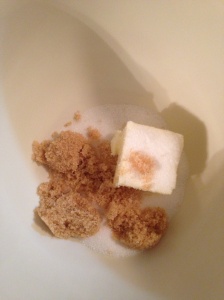
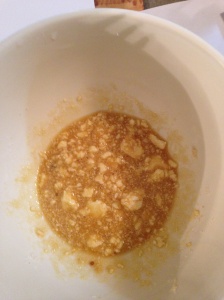
I started by mixing the butter, white sugar, and brown sugar together in a cereal bowl.

butter

After mixing those together I added the egg and vanilla and stirred everything together.

egg

Next comes the flour, baking soda, and the salt. Mixing these together with a whisk was pretty difficult, because the mixture kept clumping inside. Maybe try using something other than a whisk to mix these together.

flour


You add the chocolate chips and mix everything together!

cookiedough

The final step is to put the bowl in the microwave for 2 minutes, and then enjoy

finishedcookie


Final Product

In my opinion, this was completely disgusting. I was so disappointed in how this turned out. Mine had the consistency of a biscuit cookie, and was very hard and crunchy. It definitely doesn’t compare to a real cookie at all, and I don’t plan on ever making this again. Be wary if you’re ever wanting to make this, I wouldn’t recommend it.


Baked Potatoes!

I have always loved potatoes. I will eat them baked, fried, mashed, roasted…you name it I’ll eat it. When I found this recipe for the perfect baked potato on Pinterest I was intrigued, and immediately pinned it to my side dishes board. This recipe was so easy, I couldn’t believe it.

Ingredients:

Russet Potato (I used 2), Extra Virgin Olive Oil, and Sea Salt.

Image

I first started out by preheating my oven to 400 degrees. The I began scrubbing the potatoes in the sink to make sure they were perfectly clean. Then with a fork I poked holes several times all around the potatoes.

Image

Once I finished poking holes in the potatoes, I drizzled olive oil all over the potatoes. According to the blog this recipe came from, it’ll make the potato skin even better. After drizzling the olive oil, I rubbed it all over the potatoes to make sure they were completely covered. Then after this I lightly sprinkled sea salt over each side.

Image

Now it comes time to bake them. You set your potatoes right on the rack, and I put a pan underneath to catch any excess olive oil. You bake them for an hour, and after 30 minutes you flip them over.

Image

These. Were. Amazing. We could not stop raving about how perfectly fluffy and crisp these potatoes were. I am no longer going to cook baked potatoes in the microwave, because these taste way better. I made mine up with butter, sour cream, and shredded cheese, it was perfect. I would not change a thing, and I will be making these again.

Superbowl Spinach and Artichoke Dip!

I have been feeling under the weather all week long, which is why its taken a week for me to post this. For Superbowl Sunday I went to a Superbowl party, and wanted to make something delicious and easy to take with me. So I looked under my appetizer board on Pinterest, and saw this awesome looking spinach and artichoke dip recipe from Natasha’s Kitchen that I knew I just had to make.

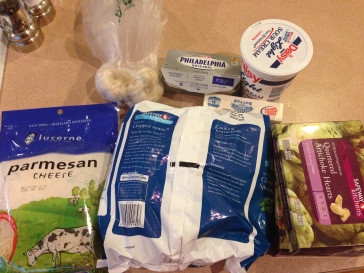
The whole process was relatively easy, all I needed for ingredients were: 

  • 8oz cream cheese (reduced fat is ok)
  • 16 oz light sour cream
  • 1 stick (8 tbsp) unsalted butter
  • 1½ – 2 cups shredded Parmesan cheese
  • 14 oz quartered artichoke hearts, drained and coarsely chopped
  • 10 oz frozen spinach (thawed and drained)
  • 2-3 garlic cloves, pressed

Her recipe called for jalapenos, but I decided against using them. 

 Image

I started the process by melting together the cream cheese, sour cream, butter, and parmesan cheese. I kept stirring till everything was melted together, and making sure to get all the lumps out.

Image

Next I stirred in the chopped artichokes, spinach, and the garlic. I stirred till I made sure everything was mixed together, and did a taste test. The dip tasted too much like sour cream, and I felt that the sour cream taste over powered any of the other flavors. So I decided to add a pinch of sugar, a pinch of salt and pepper, and finally some garlic powder. This really improved the taste and made the strong sour cream flavor disappear.

Image

I served the dip with tortilla chips and pretzel chips, and had salsa on hand incase anyone wanted to mix the dip with salsa (its a pretty good combination). It ended up being a big hit with the crowd, and everyone kept asking me for my recipe.

Image

In my opinion I would stick with the ingredients, but add less sour cream next time. Other than that, I would definitely make this dish again.